Pumpkin Oreo Balls
If you’re looking for a fun and festive treat that will wow your friends and family, look no further than these delightful Pumpkin Oreo Balls! They are the perfect blend of creamy and crunchy, with a splash of autumn flavor that makes them irresistible. I love making these little bites of joy for gatherings, cozy family nights, or just when I need a sweet pick-me-up. Trust me, once you try them, they’ll become a favorite in your home too!
These no-bake delights are not only easy to whip up but also allow you to get creative with decorations—perfect for kids and adults alike. Whether it’s Halloween or Thanksgiving, or even just a regular weeknight craving, Pumpkin Oreo Balls bring a dose of happiness to any occasion.
Why You’ll Love This Recipe
- Super Easy to Make: No baking required! Just mix, roll, chill, and dip for a stress-free dessert experience.
- Family-Friendly Fun: Kids can help with rolling the balls and decorating them—making it a great activity for family bonding.
- Make Ahead Convenience: Prep these tasty treats in advance and store them in the fridge until you’re ready to serve.
- Deliciously Festive Flavor: The combination of Oreos and pumpkin is simply divine, making each bite a delightful celebration of fall.
Ingredients You’ll Need
You’ll be pleased to know that the ingredients for these Pumpkin Oreo Balls are simple and wholesome. Gather these items, and you’ll be on your way to creating something truly special!
- 36 Oreo cookies
- 8 oz cream cheese (softened)
- 12 oz orange candy melts
Variations
This recipe is wonderfully flexible! Feel free to get creative with flavors and decorations. Here are some fun variations you might enjoy:
- Swap the Oreos: Try using different flavors of sandwich cookies like peanut butter or mint for a unique twist.
- Change Up the Coating: Instead of orange candy melts, use white chocolate or dark chocolate for a different flavor profile.
- Add Some Spice: Mix in a teaspoon of pumpkin spice into your cream cheese mixture for an extra kick of autumn flavor.
- Make Them Mini: Roll smaller balls to create bite-sized treats that are perfect for parties.
How to Make Pumpkin Oreo Balls
Step 1: Prepare the Cookies
Start by pulsing the Oreo cookies in a food processor until they become finely crumbled. This step is essential because it creates the base texture for our delicious pumpkin balls. A fine crumble ensures every bite is packed with flavor!
Step 2: Combine with Cream Cheese
Next, add in the softened cream cheese. Mix everything together until well combined; this will give your pumpkin balls their creamy richness. Take your time here—getting it just right makes all the difference.
Step 3: Shape the Balls
Using a scoop or your hands, form the mixture into 1-inch balls. Place them on a parchment-covered baking sheet and refrigerate for about 15 minutes. Chilling helps them hold their shape when you dip them in chocolate.
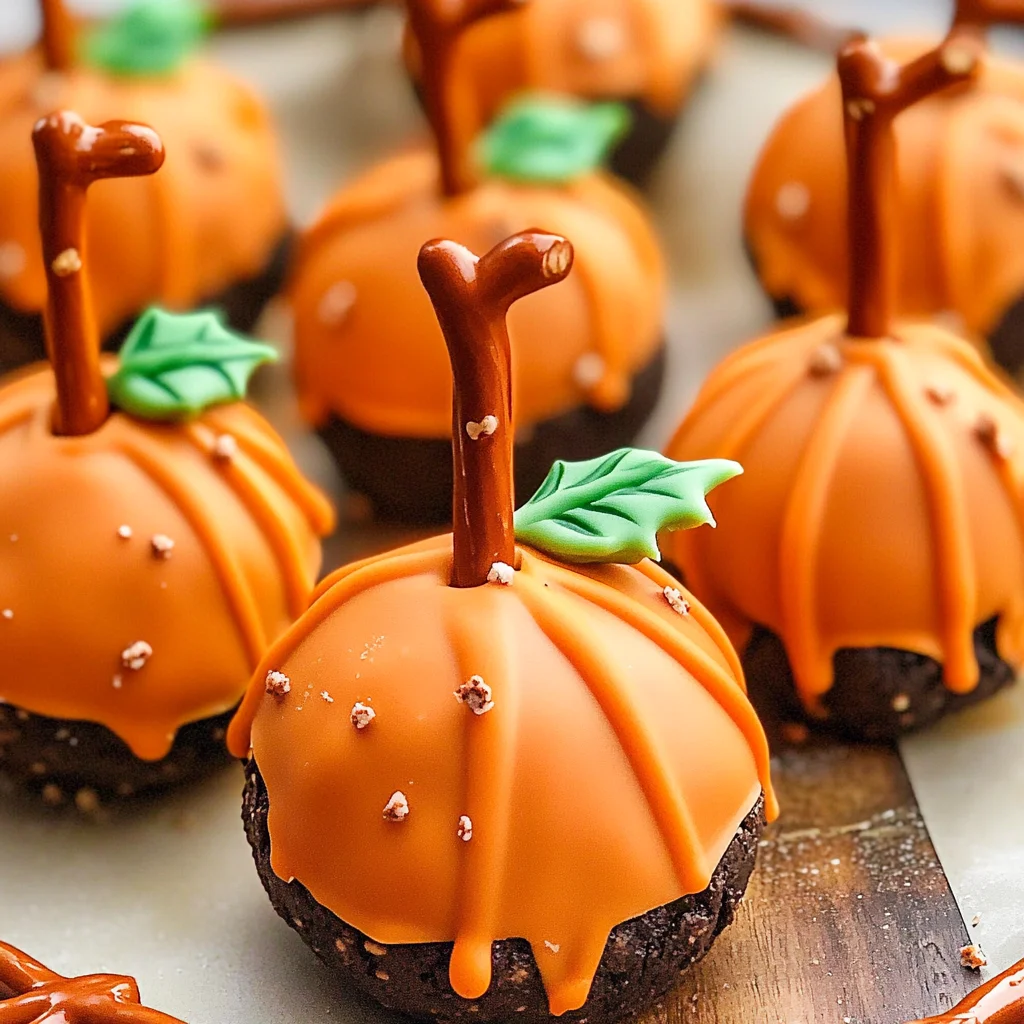
Step 4: Create Pumpkin Design
After chilling, take out your chilled balls and use a toothpick to score lines into each one, resembling pumpkins. This detail adds an adorable touch that makes them even more fun!
Step 5: Melt the Chocolate
While they chill again (for about 10 minutes), melt your orange candy melts. You can do this over a double boiler or in the microwave according to package directions. Melting properly is key—it ensures smooth coating without clumps.
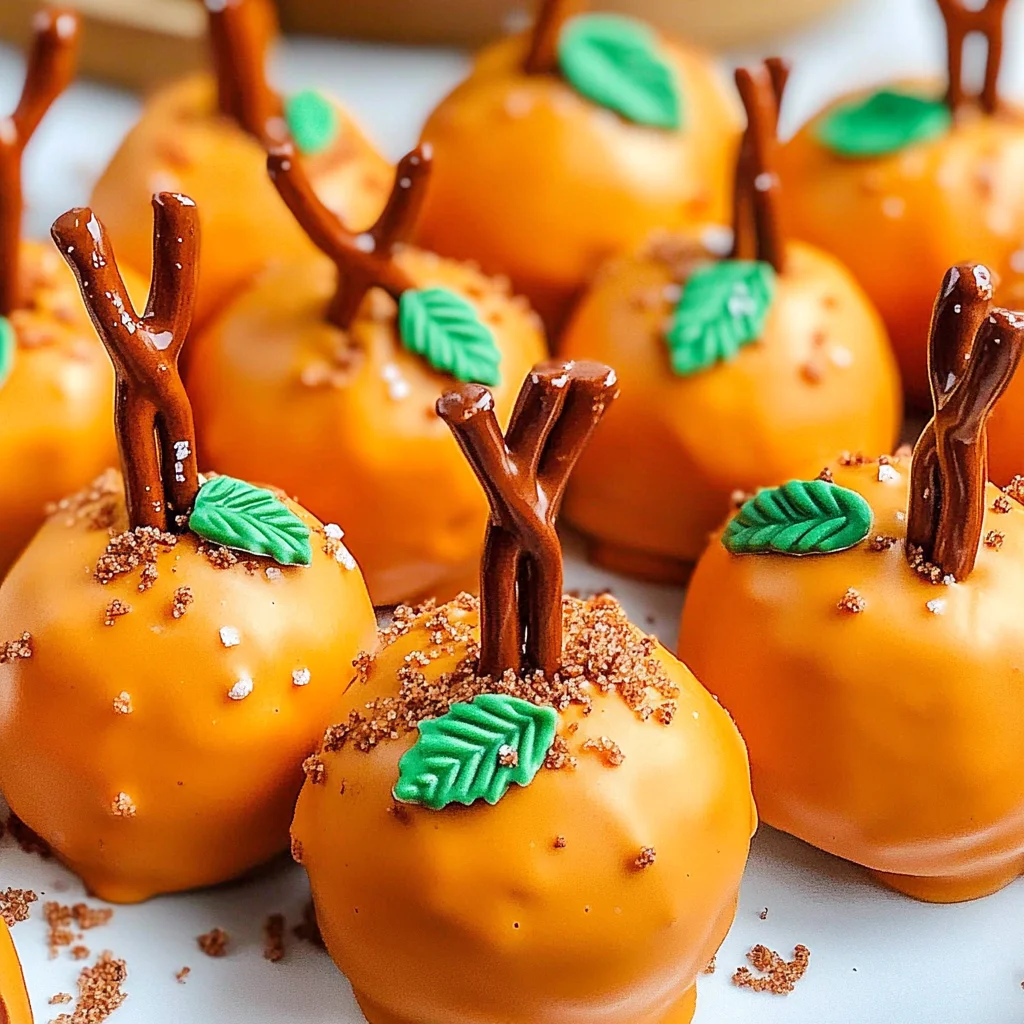
Step 6: Dip and Decorate
Now comes the fun part! Dip each pumpkin ball into the melted chocolate, allowing any excess to drip off before placing them back on the lined baking sheet. Quickly add a small pretzel stick as a stem and use green icing decorations for leaves while the chocolate is still wet.
Step 7: Final Chill
Refrigerate your decorated Pumpkin Oreo Balls until they are ready to serve. This final chill helps set everything perfectly so you can enjoy these treats at their best!
And there you have it! A delightful treat that’s not only easy but also brings smiles all around. Enjoy making—and eating—your lovely Pumpkin Oreo Balls!
Pro Tips for Making Pumpkin Oreo Balls
Creating these delightful Pumpkin Oreo Balls is a breeze, especially with a few handy tips to elevate your experience!
- Use room temperature cream cheese – This ensures a smooth and easy mixing process, giving your Oreo mixture that perfect creamy texture.
- Don’t skip the chilling step – Allowing the balls to chill helps them firm up before dipping in chocolate, making it easier to handle and ensuring they keep their shape.
- Melt chocolate properly – If using a microwave, melt in short bursts (15-30 seconds) and stir in between. This prevents the chocolate from burning and ensures a silky finish.
- Get creative with decorations – Use edible leaves or sprinkles in addition to pretzel sticks. These add color and personality, making your dessert even more festive!
- Store correctly – Keep your Pumpkin Oreo Balls in an airtight container in the fridge. They can last up to a week, but I bet they won’t last that long!
How to Serve Pumpkin Oreo Balls
Presenting your Pumpkin Oreo Balls can be just as fun as making them! With some thoughtful touches, you can turn this sweet treat into a showstopper at any gathering.
Garnishes
- Sprinkle of cinnamon – A light dusting of cinnamon on top adds warmth and enhances the pumpkin flavor.
- Chocolate drizzle – A quick drizzle of melted dark or white chocolate over the cooled balls creates an eye-catching design.
Side Dishes
- Apple slices with caramel dip – The crispness of fresh apples paired with rich caramel complements the sweetness of the Pumpkin Oreo Balls beautifully.
- Mini pumpkin muffins – These bite-sized treats echo the pumpkin theme and are perfect for guests who want just a little taste!
- Spiced chai tea – A warm cup of spiced chai provides cozy comfort that pairs wonderfully with these sweet bites.
- Whipped coconut cream – Light and fluffy coconut cream offers a dairy-free alternative that perfectly balances the richness of the Oreo balls.
With these ideas, your Pumpkin Oreo Balls will not only be delicious but also visually stunning and perfectly paired for every occasion! Enjoy sharing them with family and friends—happy indulging!
Make Ahead and Storage
These Pumpkin Oreo Balls are perfect for meal prep, making them a delightful treat you can prepare in advance for parties or cozy gatherings. They stay fresh and flavorful, allowing you to enjoy them anytime!
Storing Leftovers
- Place any leftover Pumpkin Oreo Balls in an airtight container.
- Store them in the refrigerator for up to 1 week.
- Ensure they are separated with parchment paper to prevent sticking.
Freezing
- For longer storage, freeze the Pumpkin Oreo Balls before they are dipped in chocolate.
- Arrange the balls on a baking sheet lined with parchment paper and freeze until solid.
- Transfer to a freezer-safe bag or container and store for up to 3 months.
Reheating
- These treats are best served cold or at room temperature; there’s no need to reheat!
- If desired, let them sit out for about 10-15 minutes before serving to soften slightly.
FAQs
Have some questions? No worries! Here are answers to common queries about these delicious treats.
Can I make Pumpkin Oreo Balls without cream cheese?
Yes! You can substitute cream cheese with a dairy-free cream cheese alternative or even use a nut butter like almond or cashew for a different flavor profile.
How do I decorate my Pumpkin Oreo Balls?
Get creative! Use orange candy melts as a base and garnish with pretzel sticks for stems and green icing for leaves, just like in the recipe for Pumpkin Oreo Balls.
How long do Pumpkin Oreo Balls last?
When stored properly in an airtight container, Pumpkin Oreo Balls can last up to one week in the refrigerator or three months when frozen.
Can I use different flavors of Oreos?
Absolutely! While traditional Oreos work wonderfully, feel free to experiment with seasonal flavors such as pumpkin spice or caramel apple for a unique twist on your Pumpkin Oreo Balls.
Final Thoughts
I hope you find joy in making these delightful Pumpkin Oreo Balls! They’re not only easy to create but also bring a burst of autumn flavors that everyone will love. Enjoy sharing them with family and friends—there’s something special about homemade treats that bring people together. Happy baking!
Pumpkin Oreo Balls

Indulge in the delightful flavors of fall with these easy-to-make Pumpkin Oreo Balls. These no-bake treats combine the rich creaminess of cream cheese with the iconic crunch of Oreos, creating a perfect sweet bite that’s both festive and fun. Ideal for gatherings or simply as a cozy snack, these pumpkin-flavored bites bring joy to any occasion. With minimal preparation required, you can whip them up quickly and allow your creativity to shine through their decoration. Whether enjoyed at Halloween, Thanksgiving, or during a casual family night, Pumpkin Oreo Balls are sure to impress everyone around your table!
- Prep Time: 20 minutes
- Cook Time: 0 minutes
- Total Time: 20 minutes
- Yield: Approximately 18 servings 1x
- Category: Dessert
- Method: No-Bake
- Cuisine: American
Ingredients
- 36 Oreo cookies
- 8 oz cream cheese (softened)
- 12 oz orange candy melts
Instructions
- Pulse Oreo cookies in a food processor until finely crumbled.
- Add softened cream cheese and mix until well combined.
- Form the mixture into 1-inch balls and refrigerate for 15 minutes.
- Score lines on each ball to resemble pumpkins.
- Melt orange candy melts according to package instructions.
- Dip each ball in melted chocolate, allowing excess to drip off.
- Decorate with pretzel sticks as stems and green icing for leaves while chocolate is still wet.
- Refrigerate until ready to serve.
Nutrition
- Serving Size: 1 serving
- Calories: 120
- Sugar: 10g
- Sodium: 80mg
- Fat: 7g
- Saturated Fat: 4g
- Unsaturated Fat: 2g
- Trans Fat: 0g
- Carbohydrates: 14g
- Fiber: 1g
- Protein: 1g
- Cholesterol: 15mg