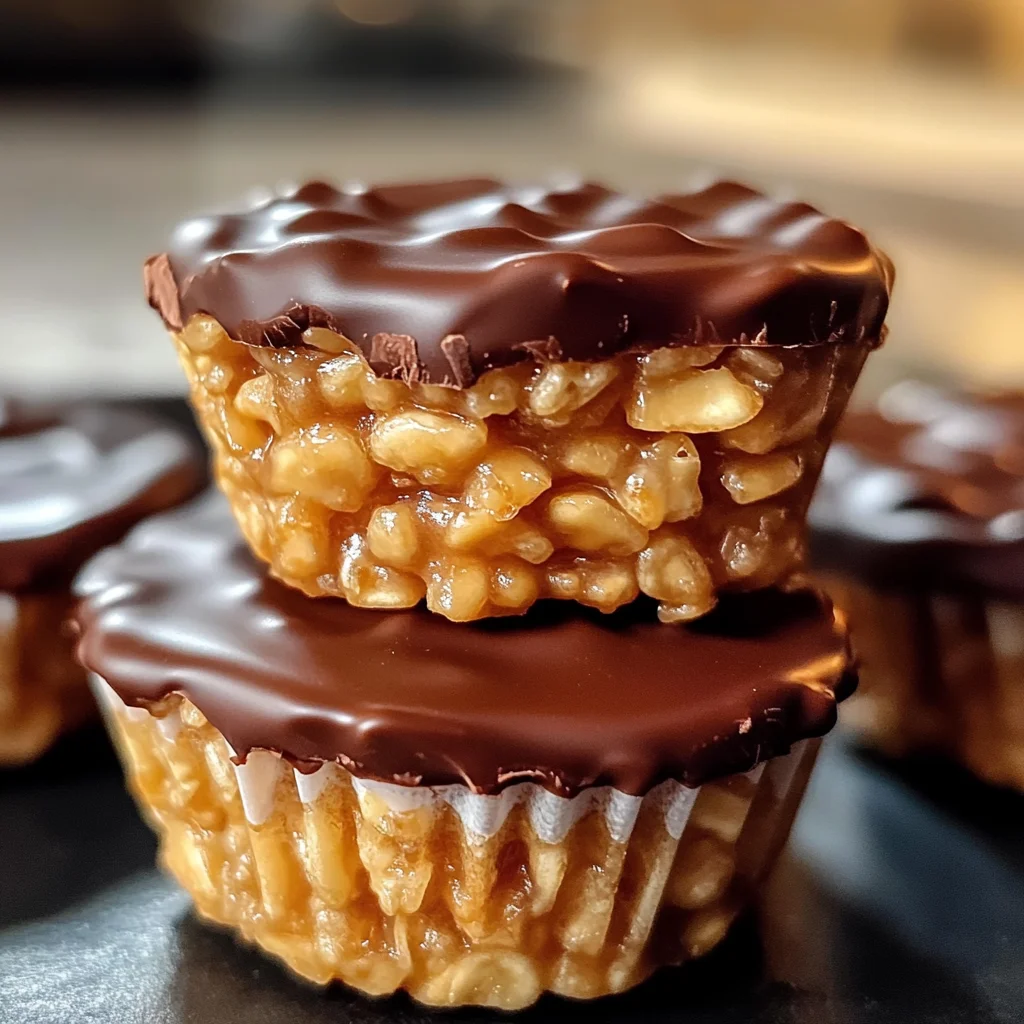
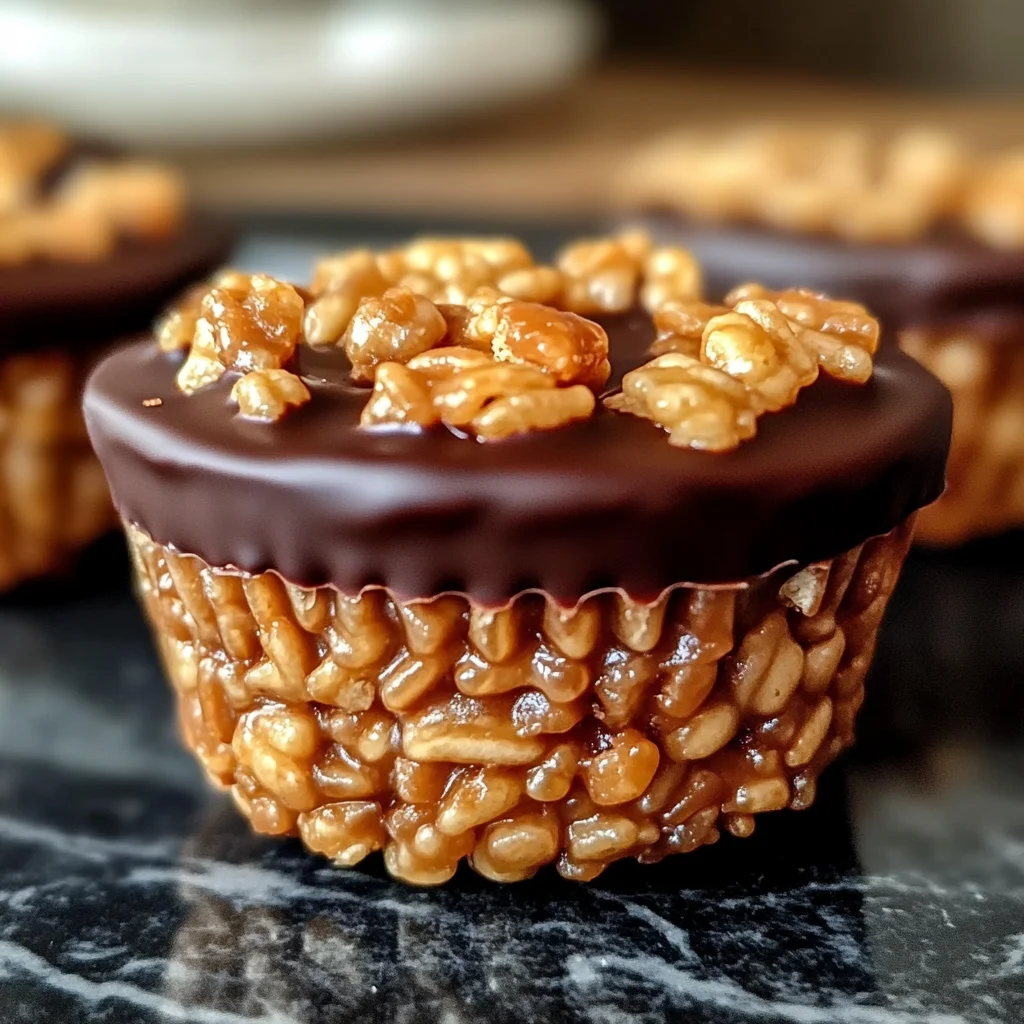
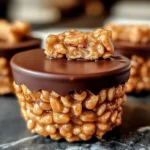
Chocolate Peanut Butter Rice Krispie Cups
If you’re looking for a quick and delightful treat that everyone will love, you’ve come to the right place! These Chocolate Peanut Butter Rice Krispie Cups are an absolute favorite in my house. They combine the creamy goodness of peanut butter with rich chocolate and that irresistible crunch from the Rice Krispies. It’s a no-bake wonder that’s perfect for busy weeknights or festive family gatherings. Trust me, once you make these, you’ll find them disappearing faster than you can say delicious!
These adorable little cups are not just treats; they hold a special place in my heart. Whether it’s a cozy movie night at home or a fun get-together with friends, these Chocolate Peanut Butter Rice Krispie Cups bring smiles all around. Plus, they are so easy to whip up that even the kids can join in on the fun!
Why You’ll Love This Recipe
- Quick and Easy: With just a few simple steps, you’ll have these treats ready in no time!
- Family-Friendly: Kids and adults alike adore the sweet combination of peanut butter and chocolate.
- No Baking Required: Say goodbye to preheating the oven; this recipe is as simple as melting and mixing!
- Make-Ahead Magic: Prep these treats ahead of time for parties or snack attacks—they store wonderfully!
- Customizable Flavor: Feel free to switch things up based on your taste preferences or what you have on hand.
Ingredients You’ll Need
Gathering your ingredients is part of the fun! You’ll find that these are simple, wholesome ingredients that come together beautifully to create those delectable cups we all love.
- 3 cups Rice Krispies cereal
- 1 cup creamy peanut butter
- 1/2 cup unsalted butter
- 1 cup mini vegan marshmallows
- 1 cup chocolate chips
- 1/2 tsp vanilla extract (optional)
- Pinch of sea salt (optional)
Variations
One of the best things about this recipe is its flexibility! You can easily adjust it to suit your taste or dietary needs. Here are some fun ideas:
- Add Crunch: Mix in some chopped nuts for extra texture and flavor.
- Switch Up the Chocolate: Try using white chocolate chips instead of regular chocolate for a different twist.
- Flavor Boost: Add a sprinkle of cinnamon or a dash of almond extract for an unexpected flavor kick.
- Go Fruity: Toss in some dried fruit like cranberries or raisins for a chewy surprise!
How to Make Chocolate Peanut Butter Rice Krispie Cups
Step 1: Melt the Base
In a medium saucepan over low heat, melt the unsalted butter and mini vegan marshmallows while stirring consistently until smooth. This step is crucial as it creates the gooey base that holds everything together.
Step 2: Add Peanut Butter
Once melted, stir in the creamy peanut butter along with vanilla extract if you’re using it. Mixing until fully combined ensures every bite has that deliciously rich peanut butter flavor.
Step 3: Mix with Cereal
Pour your Rice Krispies into a large bowl and add your warm peanut butter mixture. Gently fold until all the cereal is coated evenly. This is where the magic happens—every piece should be covered in that dreamy mixture!
Step 4: Shape the Cups
Line a muffin tin with paper liners. Spoon the mixture evenly into each cup and press down gently to form a flat surface. Pressing firmly helps keep them together when you serve them later.
Step 5: Add Chocolate Layer
Melt your chocolate chips in the microwave using short intervals (about 20 seconds), stirring in between until smooth. Spoon this melted chocolate over each cup and spread it evenly. A sprinkle of sea salt here adds an extra layer of flavor—you won’t regret it!
Step 6: Set & Serve
Allow your cups to cool at room temperature for about 20 minutes, or pop them into the refrigerator if you’re eager to dig in! Once firm, remove them from their paper liners and serve these delightful treats to your family or friends—and watch them disappear!
Pro Tips for Making Chocolate Peanut Butter Rice Krispie Cups
Creating these delightful treats is not only easy but also a lot of fun! Here are some tips to ensure your Chocolate Peanut Butter Rice Krispie Cups turn out perfectly every time.
-
Choose the Right Peanut Butter: Opt for creamy peanut butter for a smooth texture. Natural peanut butter can also work, but make sure it’s well-stirred to avoid separation.
-
Don’t Overheat the Mixture: When melting the butter and marshmallows, keep the heat low and stir constantly. This prevents burning and ensures a silky consistency.
-
Press Firmly but Gently: When shaping the cups in the muffin tin, press down firmly enough to hold their shape, but gently enough not to crush the cereal. This will help maintain that satisfying crunch!
-
Use High-Quality Chocolate Chips: The chocolate layer makes these cups even more delicious, so choose good-quality chocolate chips for a rich flavor that complements the peanut butter beautifully.
-
Experiment with Mix-Ins: Feel free to add extras like chopped nuts or dried fruit into the mixture for added texture and flavor. Just remember to adjust your main ingredients accordingly to maintain balance.
How to Serve Chocolate Peanut Butter Rice Krispie Cups
These Chocolate Peanut Butter Rice Krispie Cups are not just tasty; they’re also visually appealing! Presenting them well can enhance your guests’ experience and make your gatherings even more enjoyable.
Garnishes
- Sea Salt Flakes: A sprinkle of flaky sea salt on top adds a gourmet touch and enhances the sweet and salty flavor profile.
- Drizzle of Nut Butter: A light drizzle of extra peanut butter over each cup before serving can create an eye-catching presentation while boosting the peanut flavor.
- Chopped Nuts or Sprinkles: Adding chopped peanuts or colorful sprinkles gives a festive look that’s perfect for parties or celebrations.
Side Dishes
- Fresh Fruit Salad: A refreshing fruit salad with seasonal fruits provides a light contrast to the richness of the cups, keeping your dessert table balanced.
- Veggie Platter with Hummus: Crisp vegetables paired with hummus make for a healthy side that complements the sweetness of your treats without overwhelming them.
- Chocolate Dipped Strawberries: These classic favorites are always a hit, and their freshness pairs wonderfully with the creamy chocolate and peanut butter flavors in your cups.
- Popcorn Mix: A savory popcorn mix (think nutritional yeast or spices) can be a fun contrast to the sweetness of your dessert, making it an excellent snack option alongside.
With these tips and serving suggestions, you’ll have everything you need to impress friends and family with your homemade Chocolate Peanut Butter Rice Krispie Cups! Enjoy crafting this delightful treat!
Make Ahead and Storage
These Chocolate Peanut Butter Rice Krispie Cups are fantastic for meal prep! You can whip up a batch ahead of time, making them a perfect option for snacks or sweet treats throughout the week. Here’s how to store and enjoy them later.
Storing Leftovers
- Store any leftover cups in an airtight container at room temperature for up to 5 days.
- If it’s hot or humid, consider refrigerating them to maintain their texture.
Freezing
- To freeze, place the cups in a single layer on a baking sheet and freeze until solid.
- Transfer the frozen cups into an airtight container or freezer bag, separating layers with parchment paper.
- They can be kept frozen for about 2-3 months.
Reheating
- These treats are best enjoyed at room temperature, so simply take them out of the fridge or freezer and let them sit for a few minutes before serving.
- If you prefer warm chocolate, you can pop them in the microwave for about 10-15 seconds to slightly melt the chocolate layer.
FAQs
Here are some common questions about making Chocolate Peanut Butter Rice Krispie Cups!
Can I use crunchy peanut butter instead of creamy?
Absolutely! Crunchy peanut butter will add a delightful texture to your Chocolate Peanut Butter Rice Krispie Cups. Just keep in mind that it might alter the creaminess slightly.
How long do Chocolate Peanut Butter Rice Krispie Cups last?
When stored properly in an airtight container, these delicious treats can last up to 5 days at room temperature or longer if frozen. Enjoy them fresh for the best taste!
Are Chocolate Peanut Butter Rice Krispie Cups suitable for parties?
Yes, they’re perfect for gatherings! Their easy-to-eat cup form makes them a crowd-pleaser at parties, potlucks, or family events.
Can I substitute the chocolate chips?
Certainly! You can use dairy-free chocolate chips, carob chips, or even melted dark chocolate depending on your preference.
Final Thoughts
I hope you enjoy making these irresistible Chocolate Peanut Butter Rice Krispie Cups as much as I do! They’re not only simple to prepare but also bring together flavors that everyone loves. Whether you’re treating yourself or sharing with friends and family, I’m sure they’ll be a hit. Happy cooking and indulging!
Chocolate Peanut Butter Rice Krispie Cups
Looking for a delightful no-bake treat that everyone will adore? Try these Chocolate Peanut Butter Rice Krispie Cups! Combining creamy peanut butter, rich chocolate, and the satisfying crunch of Rice Krispies, this recipe is perfect for busy weeknights or festive gatherings. The best part? They’re incredibly easy to make, requiring minimal effort while delivering maximum flavor. Ideal for sharing with family and friends, these sweet treats are sure to disappear quickly!
- Prep Time: 15 minutes
- Cook Time: 5 minutes
- Total Time: 20 minutes
- Yield: About 12 servings 1x
- Category: Dessert
- Method: No-Bake
- Cuisine: American
Ingredients
- 3 cups Rice Krispies cereal
- 1 cup creamy peanut butter
- 1/2 cup unsalted butter
- 1 cup mini vegan marshmallows
- 1 cup chocolate chips
- Pinch of sea salt (optional)
Instructions
- Melt the unsalted butter and mini vegan marshmallows in a medium saucepan over low heat, stirring until smooth.
- Stir in the creamy peanut butter (and vanilla extract if using) until fully combined.
- In a large bowl, mix the melted mixture with Rice Krispies until evenly coated.
- Line a muffin tin with paper liners and spoon the mixture into each cup, pressing down gently.
- Melt the chocolate chips in the microwave, then spoon over each cup and spread evenly.
- Let cool for about 20 minutes at room temperature or refrigerate until firm.
Nutrition
- Serving Size: 1 serving
- Calories: 200
- Sugar: 12g
- Sodium: 95mg
- Fat: 10g
- Saturated Fat: 4g
- Unsaturated Fat: 6g
- Trans Fat: 0g
- Carbohydrates: 25g
- Fiber: 1g
- Protein: 3g
- Cholesterol: 10mg