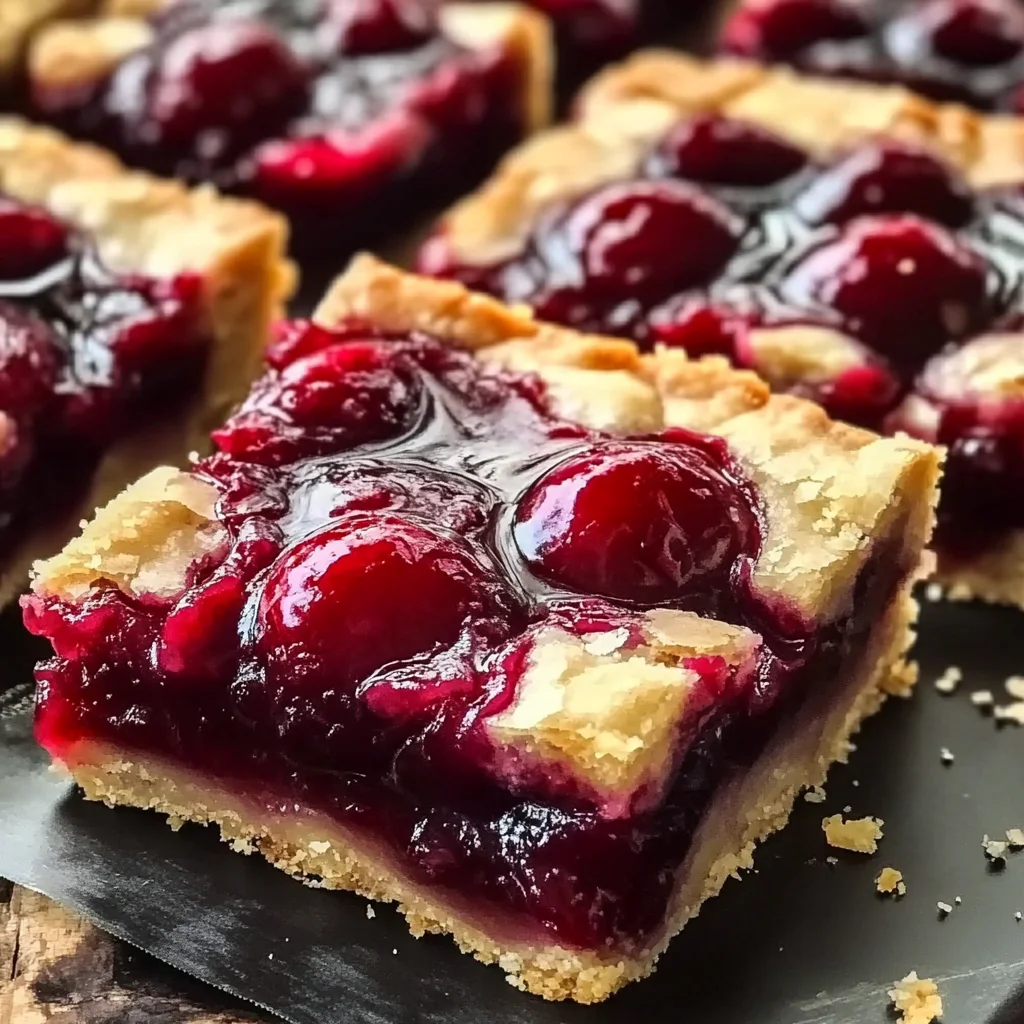
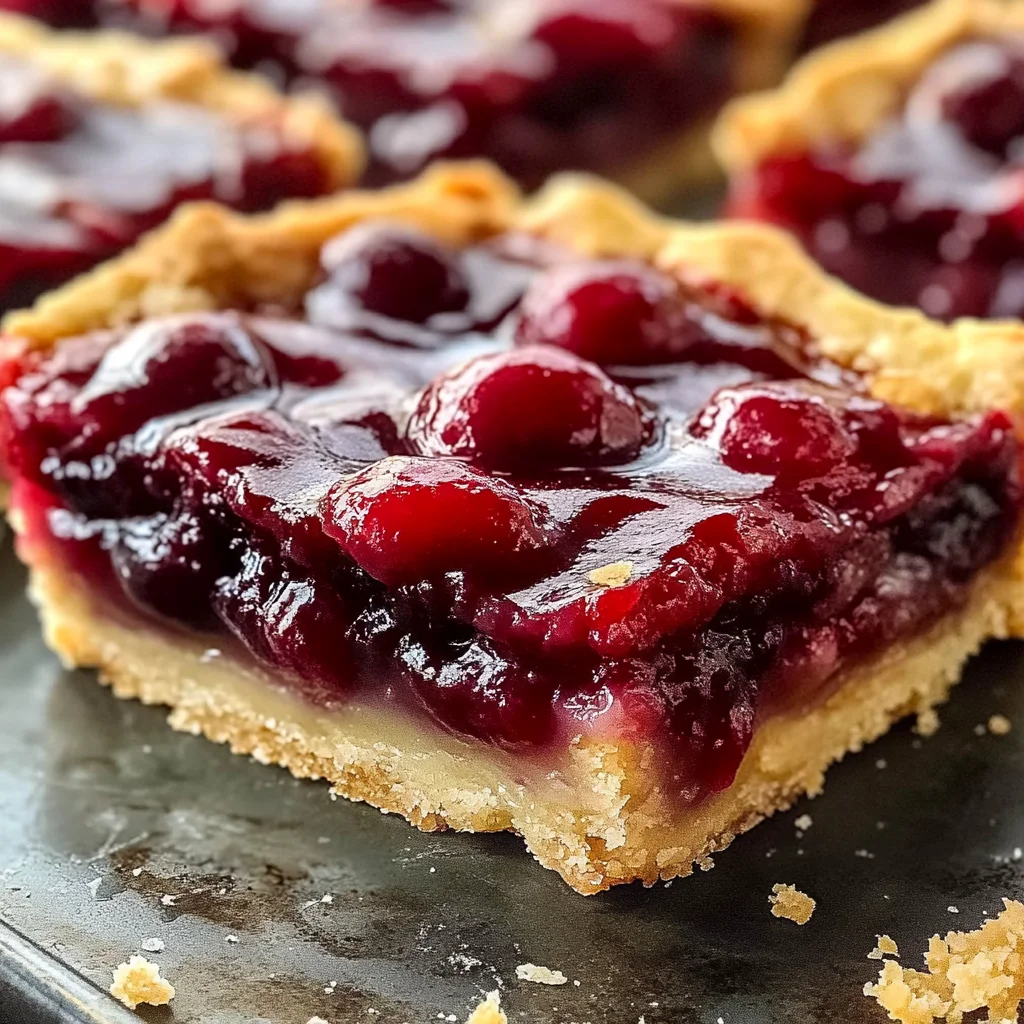
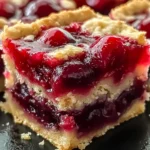
Easy Cherry Pie Bars: A Simple Cherry Dessert to Savor
If you’re looking for a dessert that’s as easy to make as it is delightful to eat, you’ve come to the right place! These Easy Cherry Pie Bars: A Simple Cherry Dessert to Savor are perfect for any occasion. Whether it’s a busy weeknight, a family gathering, or just a sweet treat for yourself, these bars will bring joy to your table. The combination of sweet cherries and buttery crust, with a touch of almond extract, makes them truly special—and trust me, they won’t last long!
This recipe has been passed down through generations in my family, bringing back fond memories of summer days spent baking with my grandmother. I’m excited to share it with you so you can create your own delicious moments in the kitchen!
Why You’ll Love This Recipe
- Quick and Easy: With just a few simple steps, you’ll have warm cherry pie bars ready in no time.
- Family-Favorite: Everyone loves the sweet and tart flavor of cherries—these bars are sure to be a hit!
- Make-Ahead Friendly: You can bake these bars ahead of time and keep them fresh for gatherings or snacks throughout the week.
- Deliciously Versatile: Enjoy them plain or dressed up with glaze; they’re perfect for any occasion.
Ingredients You’ll Need
These are simple, wholesome ingredients that come together beautifully in this recipe. Let’s gather what you’ll need:
For the Bars
- 1 cup softened butter
- 1 cup sugar
- 2 large eggs, room temp
- 1 tsp almond extract
- 1 tsp vanilla extract
- 2 ½ cups all-purpose flour
- ½ tsp salt
- 1 (21 oz) can premium cherry pie filling
For the Glaze
- 1 cup confectioners’ sugar
- 1 tsp almond extract
- ½ tsp vanilla
- Milk as needed
Variations
Feel free to get creative! This recipe is flexible, and you can try different flavors and toppings. Here are some fun ideas:
- Add nuts: Toss in some chopped almonds or walnuts for extra crunch.
- Use different fruit fillings: Swap out cherries for blueberries or peaches if you’re feeling adventurous!
- Try a crumb topping: Mix some oats into the remaining dough for a tasty crumble effect on top.
- Change up the extracts: Substitute vanilla for lemon extract for a refreshing twist.
How to Make Easy Cherry Pie Bars: A Simple Cherry Dessert to Savor
Step 1: Preheat Your Oven
Start by preheating your oven to 350°F (175°C). This ensures that your cherry pie bars bake evenly and develop that lovely golden color we all love.
Step 2: Cream Butter and Sugar
In a large mixing bowl, cream together the softened butter and sugar until light and fluffy. This step is key because it helps incorporate air into the mixture, giving your bars that perfect texture.
Step 3: Add Eggs and Extracts
Next, crack in those room temperature eggs along with your almond and vanilla extracts. Mixing these ingredients well will infuse your dough with wonderful flavors that complement the cherries beautifully.
Step 4: Mix in Flour and Salt
Gradually add in the all-purpose flour and salt until everything is combined. The dough should be soft but not sticky—perfect for pressing into your pan!
Step 5: Press Dough into Pan
Take half of your dough and press it evenly into the bottom of a greased baking pan. This forms the base of your bars which will hold all that delicious cherry filling.
Step 6: Add Cherry Filling
Spread the cherry pie filling over the base evenly. The sweet-tart cherries will be the star of this dessert!
Step 7: Dollop Remaining Dough
Finally, take spoonfuls of the remaining dough and dollop them over the top of the cherry filling. This creates a lovely texture once baked.
Step 8: Bake Your Bars
Pop your pan into the preheated oven and bake for about 35–40 minutes or until golden brown. Letting them cool slightly before cutting will help them set up nicely.
Step 9: Drizzle with Glaze
Mix together confectioners’ sugar, almond extract, vanilla, and enough milk to reach your desired consistency for glaze. Drizzle this over cooled bars before serving—it’s the perfect finishing touch!
Now go ahead and enjoy these Easy Cherry Pie Bars: A Simple Cherry Dessert to Savor with friends and family! They’re sure to become a cherished recipe in your home too!
Pro Tips for Making Easy Cherry Pie Bars: A Simple Cherry Dessert to Savor
Baking can be a delightful adventure, and with these pro tips, you’ll make your cherry pie bars even more delicious and eye-catching!
-
Chill the Dough: Before pressing the dough into the pan, chilling it for about 30 minutes helps it hold its shape better while baking. This prevents the crust from becoming too crumbly.
-
Use Fresh Cherries: If you’re feeling adventurous, substitute canned pie filling with fresh cherries. Just pit and chop them, then toss with a bit of sugar and cornstarch for a fresh twist that brightens up the flavor.
-
Don’t Overmix the Batter: When combining your wet and dry ingredients, mix just until combined. Overmixing can lead to tough bars instead of soft and tender ones.
-
Experiment with Extracts: While almond extract is a lovely addition, don’t hesitate to play around with other extracts like lemon or coconut for a unique flavor profile that can surprise your taste buds.
-
Let Them Cool Completely: Allowing your bars to cool completely before cutting ensures clean edges and makes them easier to serve. Plus, this helps enhance flavors as they settle!
How to Serve Easy Cherry Pie Bars: A Simple Cherry Dessert to Savor
Presentation is key when it comes to desserts, and these cherry pie bars are no exception! Here are some ideas on how you can serve them beautifully.
Garnishes
- Powdered Sugar: A light dusting of powdered sugar on top adds an elegant touch and enhances the visual appeal.
- Fresh Mint: Placing a sprig of fresh mint on each bar not only looks pretty but also adds a refreshing flavor contrast.
- Whipped Coconut Cream: For a dairy-free option, serve with a dollop of whipped coconut cream to add richness without overpowering the cherry flavor.
Side Dishes
- Vanilla Ice Cream: A scoop of vanilla ice cream complements the tartness of the cherries perfectly, creating a delightful contrast in temperature and texture.
- Greek Yogurt: Serving alongside a small bowl of Greek yogurt adds creaminess while providing a tangy balance that enhances the sweetness of the bars.
- Fruit Salad: A colorful fruit salad made with seasonal fruits will brighten up your plate and add freshness that pairs wonderfully with the rich cherry flavors.
- Coffee or Tea: Offering a cup of coffee or herbal tea alongside these bars makes for an inviting dessert experience—perfect for an afternoon gathering or casual get-together.
Enjoy your Easy Cherry Pie Bars—each bite is sure to bring back fond memories while creating new ones!
Make Ahead and Storage
These Easy Cherry Pie Bars are perfect for meal prep! You can whip up a batch in advance, making them an ideal treat for busy weekdays or unexpected guests. Here’s how to store and preserve their delightful flavors:
Storing Leftovers
- Store leftover cherry pie bars in an airtight container at room temperature for up to 3 days.
- If you prefer, refrigerate them, where they’ll stay fresh for about a week.
- Be sure to separate layers with parchment paper if stacking to prevent sticking.
Freezing
- To freeze, let the bars cool completely, then cut them into squares.
- Place the squares in a single layer on a baking sheet and freeze until solid.
- Transfer the frozen bars to a freezer-safe bag or container. They can last up to 3 months in the freezer.
Reheating
- If you want to enjoy warm cherry pie bars, preheat your oven to 350°F (175°C).
- Place the desired number of bars on a baking sheet and cover loosely with foil.
- Heat for about 10-15 minutes until warmed through; this helps maintain their soft texture.
FAQs
Here are some common questions regarding these delicious cherry pie bars:
Can I use fresh cherries instead of cherry pie filling for Easy Cherry Pie Bars?
Yes! You can make your own cherry filling using fresh cherries. Simply pit and slice them, then cook with sugar and a little cornstarch until thickened. This homemade filling will give your bars a delightful freshness.
How do I know when the Easy Cherry Pie Bars are done baking?
The bars are ready when the top is lightly golden and set. A toothpick inserted in the middle should come out clean or with just a few moist crumbs attached.
Can I substitute other fruits in this Easy Cherry Pie Bars recipe?
Absolutely! Feel free to experiment with other fruits like blueberries, peaches, or raspberries. Just keep in mind that different fruits may require slight adjustments in sweetness.
What makes these Easy Cherry Pie Bars so special?
The combination of almond extract with the sweet-tart cherry filling adds an extraordinary flavor that elevates these bars. It’s simple yet oh-so-delicious!
How long do these Easy Cherry Pie Bars last?
When stored properly, these bars will stay fresh for about 3 days at room temperature or up to a week in the fridge. You can also freeze them for longer storage!
Final Thoughts
I hope you find joy in making these Easy Cherry Pie Bars: A Simple Cherry Dessert to Savor! They’re not only delicious but also bring back warm memories of family gatherings. Whether you enjoy them as a quick snack or serve them at your next get-together, I’m certain they’ll be a hit. Happy baking, and may your kitchen be filled with sweet aromas!
Easy Cherry Pie Bars: A Simple Cherry Dessert to Savor
If you’re seeking a delightful dessert that’s as easy to prepare as it is satisfying to eat, look no further than these Easy Cherry Pie Bars: A Simple Cherry Dessert to Savor. Perfect for any occasion, whether a busy weeknight or a family gathering, these bars combine sweet cherries with a buttery crust and a hint of almond extract. They are sure to become a favorite in your home! With their warm, comforting flavors and the option to dress them up with glaze, you’ll want to enjoy these treats time and again. This recipe is not only simple but also versatile—feel free to experiment with different fruit fillings or toppings!
- Prep Time: 15 minutes
- Cook Time: 35–40 minutes
- Total Time: 0 hours
- Yield: Approximately 16 servings 1x
- Category: Dessert
- Method: Baking
- Cuisine: American
Ingredients
- 1 cup softened butter
- 1 cup sugar
- 2 large eggs (room temperature)
- 1 tsp almond extract
- 1 tsp vanilla extract
- 2 ½ cups all-purpose flour
- ½ tsp salt
- 1 (21 oz) can premium cherry pie filling
Instructions
- Preheat your oven to 350°F (175°C).
- Cream together softened butter and sugar until light and fluffy.
- Add room-temperature eggs, almond extract, and vanilla extract; mix well.
- Gradually incorporate all-purpose flour and salt until combined.
- Press half of the dough into a greased baking pan.
- Spread cherry pie filling evenly over the dough base.
- Dollop remaining dough on top of the filling.
- Bake for 35–40 minutes until golden brown; let cool before slicing.
- For glaze, mix confectioners' sugar, almond extract, vanilla, and enough milk for desired consistency; drizzle over cooled bars.
Nutrition
- Serving Size: 1 bar (50g)
- Calories: 210
- Sugar: 15g
- Sodium: 80mg
- Fat: 9g
- Saturated Fat: 5g
- Unsaturated Fat: 4g
- Trans Fat: 0g
- Carbohydrates: 30g
- Fiber: 1g
- Protein: 2g
- Cholesterol: 40mg