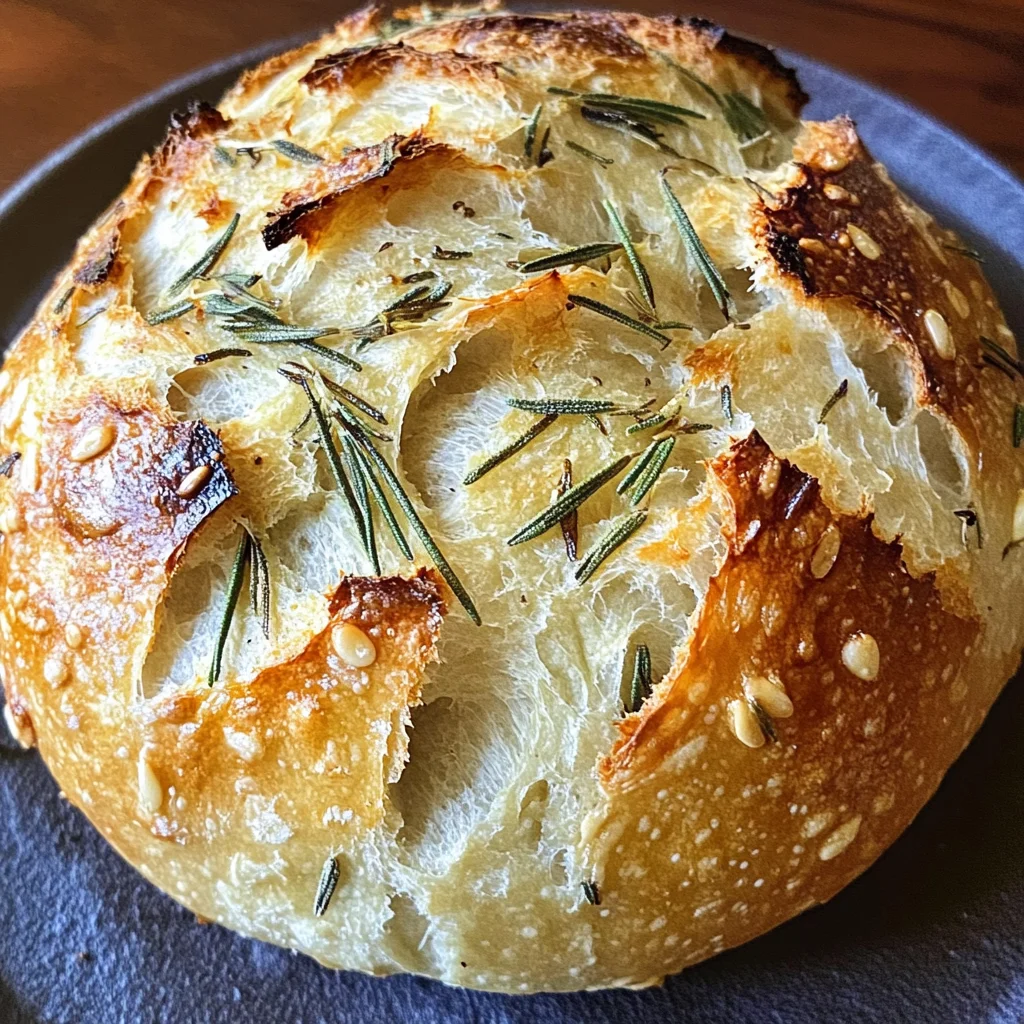
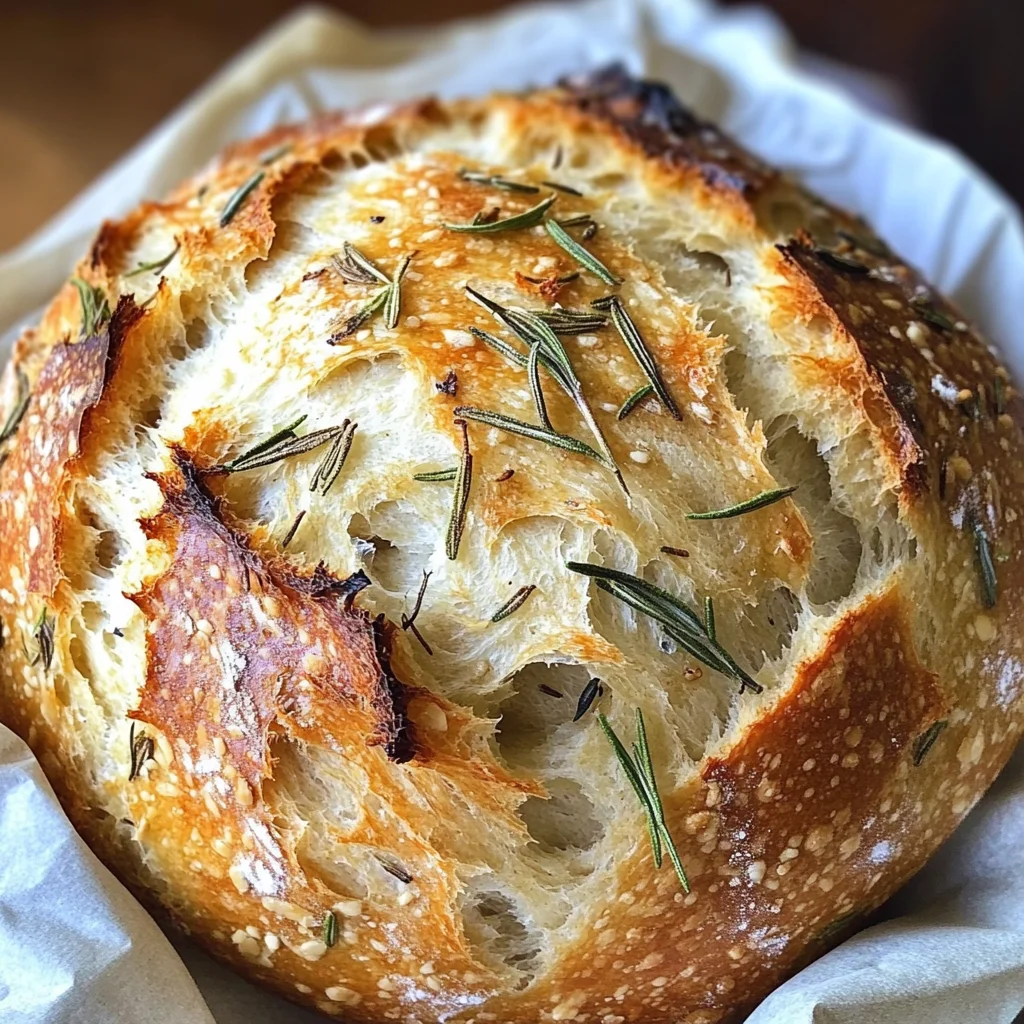
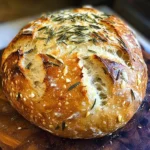
Rosemary & Roasted Garlic Artisan Bread
If you’re looking for a delightful addition to your dinner table or a cozy treat for a family gathering, then this Rosemary & Roasted Garlic Artisan Bread is just what you need! This recipe has been a cherished favorite in my home for years. The aroma of roasted garlic mingling with fresh rosemary fills the air as the bread bakes, making it impossible to resist. Whether served alongside a hearty soup or enjoyed on its own with a drizzle of olive oil, this bread is sure to impress.
This artisan bread is not only delicious but also incredibly easy to make, thanks to its no-knead technique. It’s perfect for busy weeknights or leisurely weekends when you want to indulge in some homemade goodness without spending hours in the kitchen.
Why You’ll Love This Recipe
- Simple Preparation: No kneading required! Just mix and let it rise.
- Delicious Flavor: The combination of roasted garlic and rosemary brings incredible depth to every bite.
- Make-Ahead Option: Prepare the dough in advance and bake whenever you’re ready.
- Perfect for Sharing: This loaf is ideal for gatherings, as it pairs beautifully with various dishes.
- Satisfying Texture: Enjoy a crusty exterior and soft, chewy interior that everyone will love!
Ingredients You’ll Need
These ingredients are simple and wholesome, making it easy to whip up this beautiful loaf at home. Gather the following:
For the Bread
- 1 head garlic
- Extra-virgin olive oil
- Coarse sea salt and freshly ground black pepper
- 1½ cups water, room temperature (at or near 70°F/21°C)
- 1 teaspoon active dry yeast
- 3 cups bread or all-purpose flour, plus more for dusting
- ½ teaspoon dried oregano
- 1 teaspoon kosher or fine sea salt
- 2 teaspoons finely chopped rosemary (plus more to sprinkle across the top)
- 1 whole head roasted garlic (smashed)
- 1 tablespoon extra-virgin olive oil
Variations
One of the best things about this Rosemary & Roasted Garlic Artisan Bread is its flexibility! Here are some fun variations you can try:
- Add Cheese: Incorporate shredded cheese like parmesan or mozzarella into the dough for an extra cheesy flavor.
- Infuse with Other Herbs: Try substituting rosemary with thyme or basil for a different herbal twist.
- Mix in Olives: Add chopped olives to the dough before baking for a Mediterranean flair.
- Top with Seeds: Sprinkle sesame or poppy seeds on top before baking for added texture and flavor.
How to Make Rosemary & Roasted Garlic Artisan Bread
Step 1: Roast the Garlic
Start by slicing the head of garlic in half. Drizzle some extra-virgin olive oil over the exposed cloves and season them generously with coarse sea salt and freshly ground black pepper. Wrap them tightly in foil and roast at 400ºF (204ºC) for about 40 minutes. Roasting brings out the sweetness of the garlic, creating a rich flavor that will elevate your bread.
Step 2: Prepare the Dough
Once your garlic has cooled, sprinkle the yeast over room temperature water in a large bowl and let it sit for 10-15 minutes until frothy. Meanwhile, combine flour, oregano, salt, and chopped rosemary in another bowl. Afterward, add your yeast mixture along with smashed roasted garlic and olive oil. Mix gently until just combined; it’s okay if it’s slightly sticky!
Step 3: Let It Rise
Cover your bowl with plastic wrap or a clean kitchen towel and place it somewhere warm. Allow it to rise until doubled in size—this usually takes about 8-10 hours. The long rise time develops flavor without any kneading!
Step 4: Shape Your Dough
When your dough has risen beautifully, transfer it onto a floured surface using floured hands or a dough scraper. Gently fold it into itself several times until you have a round ball. Place seam side up in a floured bowl or proofing basket, dust lightly with flour, cover it again, and refrigerate overnight—or up to 48 hours!
Step 5: Preheat Your Oven
When you’re ready to bake your bread, preheat your oven to 450ºF (232ºC) with your Dutch oven inside. This preheating step is crucial as it helps create that lovely crust we all adore.
Step 6: Score and Bake
Carefully turn out your dough onto parchment paper seam side down. Shape it gently into a loaf if needed and score the top with a sharp knife—this allows steam to escape while baking! Transfer the parchment paper with dough into your hot Dutch oven, cover it up, and bake for 30 minutes. Then remove the lid and bake for an additional 15-20 minutes until golden brown.
Step 7: Cool Before Slicing
Using parchment edges, lift your beautiful loaf from the Dutch oven onto a wire cooling rack. Let it cool for up to an hour before slicing—it’s tempting to dig right in but allowing it time will enhance its texture!
Now you’re ready to enjoy this fantastic Rosemary & Roasted Garlic Artisan Bread! Serve it warm alongside your favorite dishes or simply enjoy it on its own. Happy baking!
Pro Tips for Making Rosemary & Roasted Garlic Artisan Bread
Baking can be a wonderfully rewarding experience, especially when you see your homemade bread come out of the oven! Here are some tips to ensure your Rosemary & Roasted Garlic Artisan Bread turns out perfect every time.
-
Use fresh ingredients: Fresh rosemary and garlic will enhance the flavor significantly. It makes a world of difference in aroma and taste!
-
Perfect your proofing environment: Aim for a warm, draft-free spot. A consistent temperature helps yeast activate properly, leading to better rise and texture.
-
Be patient with cold proofing: Allowing the dough to cold proof overnight (or even up to 48 hours) develops complex flavors and improves texture. It might take longer, but it’s well worth the wait!
-
Invest in a Dutch oven: This tool is essential for creating that incredible crust on artisan bread. The steam trapped inside mimics a professional baking environment.
-
Experiment with scoring designs: Scoring not only looks beautiful but also controls how the bread expands while baking. Get creative with your patterns!
How to Serve Rosemary & Roasted Garlic Artisan Bread
This delicious artisan bread is not just a treat on its own; it can be transformed into an appealing centerpiece for any meal. Here are some ideas to elevate your serving experience.
Garnishes
- Extra virgin olive oil drizzle: A light drizzle of high-quality olive oil adds richness and enhances flavor.
- Fresh herbs: Sprinkle additional chopped rosemary or thyme on top before serving for a pop of color and freshness.
Side Dishes
- Roasted vegetables: Seasonal veggies like carrots, zucchini, or bell peppers pair beautifully with this bread’s savory notes.
- Creamy soups: A smooth tomato or butternut squash soup complements the crusty texture of the bread perfectly.
- Cheese platter: Offer a selection of creamy cheeses like goat cheese or herb-infused cream cheese to spread on warm slices.
- Salad greens: A simple mixed green salad with lemon vinaigrette provides a refreshing contrast to the hearty loaf.
Enjoy this delightful Rosemary & Roasted Garlic Artisan Bread as part of your next meal, and watch how it quickly becomes a favorite among family and friends!
Make Ahead and Storage
This Rosemary & Roasted Garlic Artisan Bread is not just delicious but also perfect for meal prep. You can make it ahead of time and enjoy fresh bread throughout the week, making your meals even more delightful.
Storing Leftovers
- Allow the bread to cool completely before storing.
- Wrap the loaf in plastic wrap or aluminum foil to keep it fresh.
- Store at room temperature for up to 3 days or in the refrigerator for up to a week.
Freezing
- Slice the bread before freezing for easy access.
- Wrap slices tightly in plastic wrap and then place them in a freezer bag.
- Freeze for up to 3 months. Don’t forget to label your bags with the date!
Reheating
- To reheat, preheat your oven to 350°F (175°C).
- Place the wrapped bread directly on the oven rack for about 10-15 minutes until warmed through.
- For an even better crust, unwrap the bread during the last few minutes of reheating.
FAQs
If you have questions about this delicious bread recipe, you’re in the right place!
How do I achieve a crusty exterior on my Rosemary & Roasted Garlic Artisan Bread?
To achieve that perfect crust, ensure your oven is fully preheated and use a Dutch oven while baking. The steam trapped inside will create that beautiful crispy outer layer!
Can I use fresh rosemary instead of dried in my Rosemary & Roasted Garlic Artisan Bread?
Absolutely! Fresh rosemary adds a lovely aroma and flavor. Just chop it finely and use about three times the amount compared to dried rosemary.
How long can I store my Rosemary & Roasted Garlic Artisan Bread?
You can store your artisan bread at room temperature for up to three days or refrigerate it for up to one week. For longer storage, consider freezing it.
Can I make this Rosemary & Roasted Garlic Artisan Bread without a Dutch oven?
While a Dutch oven is ideal for creating steam, you can bake this bread on a baking sheet. Just place a pan with water at the bottom of the oven to help create steam.
Final Thoughts
This Rosemary & Roasted Garlic Artisan Bread is truly special—it’s not just easy to make but also fills your kitchen with an irresistible aroma. I hope you enjoy every step of making this delightful loaf as much as I do! Don’t hesitate to get creative with your own twists on this recipe. Happy baking!
Rosemary & Roasted Garlic Artisan Bread
Indulge in the delightful flavors of Rosemary & Roasted Garlic Artisan Bread, a perfect addition to any meal. This no-knead bread is incredibly easy to make, allowing you to spend less time in the kitchen and more time enjoying delicious homemade goodness. The rich aroma of roasted garlic mingled with fresh rosemary creates an irresistible scent that will fill your home while baking. With a crusty exterior and a soft, chewy interior, this artisan loaf is ideal for serving alongside soups or simply enjoyed with olive oil. Whether you’re hosting a gathering or just treating yourself, this bread will surely impress.
- Prep Time: 20 minutes
- Cook Time: 50 minutes
- Total Time: 1 hour 10 minutes
- Yield: Approximately 12 servings 1x
- Category: Bread
- Method: Baking
- Cuisine: American
Ingredients
- 1 head garlic
- Extra-virgin olive oil
- Coarse sea salt and freshly ground black pepper
- 1½ cups water, room temperature
- 1 teaspoon active dry yeast
- 3 cups bread or all-purpose flour
- ½ teaspoon dried oregano
- 1 teaspoon kosher or fine sea salt
- 2 teaspoons finely chopped rosemary
Instructions
- Roast the garlic by cutting the head in half, drizzling with olive oil, seasoning with salt and pepper, wrapping in foil, and baking at 400°F (204°C) for about 40 minutes.
- After cooling, combine yeast and water in a bowl for 10-15 minutes until frothy. In another bowl, mix flour, oregano, salt, and chopped rosemary.
- Combine the yeast mixture with flour mixture along with smashed roasted garlic and olive oil. Mix until just combined.
- Cover the bowl and let it rise in a warm place for about 8-10 hours until doubled in size.
- Shape the dough into a ball and place it seam side up in a floured bowl; cover and refrigerate overnight (up to 48 hours).
- Preheat your oven to 450°F (232°C) with a Dutch oven inside.
- Transfer the dough onto parchment paper, score the top, and bake covered for 30 minutes followed by an additional 15-20 minutes uncovered until golden brown.
- Cool on a wire rack before slicing.
Nutrition
- Serving Size: 1 slice
- Calories: 140
- Sugar: 0g
- Sodium: 300mg
- Fat: 3g
- Saturated Fat: 0.5g
- Unsaturated Fat: 2g
- Trans Fat: 0g
- Carbohydrates: 25g
- Fiber: 1g
- Protein: 4g
- Cholesterol: 0mg